


Creating your own 3D printer files is an exciting process that involves designing a 3D model in CAD software, exporting it as an STL or OBJ file, and then converting it into G-code using a slicing program. By following this simple pipeline, you can turn any digital idea into a physical object. Learning these steps unlocks the full creative potential of your 3D printer.
Imagine looking at a plastic bracket on your wall and thinking, “I wish I could make a custom shelf for this.” Or maybe you want to design a custom toy for your desk. You buy a 3D printer, plug it in, and feel a surge of excitement. But then you face a big question: how do you actually make the things you want to print? If you are tired of only printing models that other people designed, you are in the right place.
Learning how to create 3D printer files is the ultimate superpower in the world of making. It turns your printer from a simple novelty into a personal factory. In this guide, we will break down the entire process into easy, bite-sized steps. You do not need a degree in engineering to get started. All you need is some curiosity and a little bit of patience. We will cover everything from choosing the right software to exporting your final code.
Key Takeaways
- Understand the basics: You need to design a 3D model before turning it into a file your printer can read.
- Pick the right tools: Beginners should start with free, easy tools like Tinkercad, while pros use Fusion 360 or Blender.
- Choose the correct formats: Always export your designs as STL, OBJ, or 3MF files.
- Slice your model: Use a slicer like Cura to turn your model into G-code instructions.
- Design for success: Avoid steep overhangs and keep your models water-tight to prevent failed prints.
Quick Answers to Common Questions
What software is best for beginners to make 3D printer files?
Tinkercad is the best free, web-based tool for beginners to design their own models. It uses simple shapes like boxes and cylinders to build objects quickly.
What is the most common file format for 3D printing?
The STL format is the most common file type used in 3D printing today. However, the newer 3MF format is gaining popularity because it is smaller and less prone to errors.
Can you 3D print a standard JPG or PNG image?
No, you cannot print a flat image directly because 3D printers require three-dimensional coordinates. You must first convert your 2D image into a 3D model using design software.
What is a slicer in 3D printing?
A slicer is a software program that cuts your 3D digital model into thin horizontal layers. It translates your design into G-code, which is the direct language your printer can read.
Do I need a powerful computer to design 3D models?
No, you do not need an expensive computer to start designing. Web-based programs like Tinkercad run smoothly on almost any basic computer or tablet.
📑 Table of Contents
Understanding the 3D Printing Pipeline
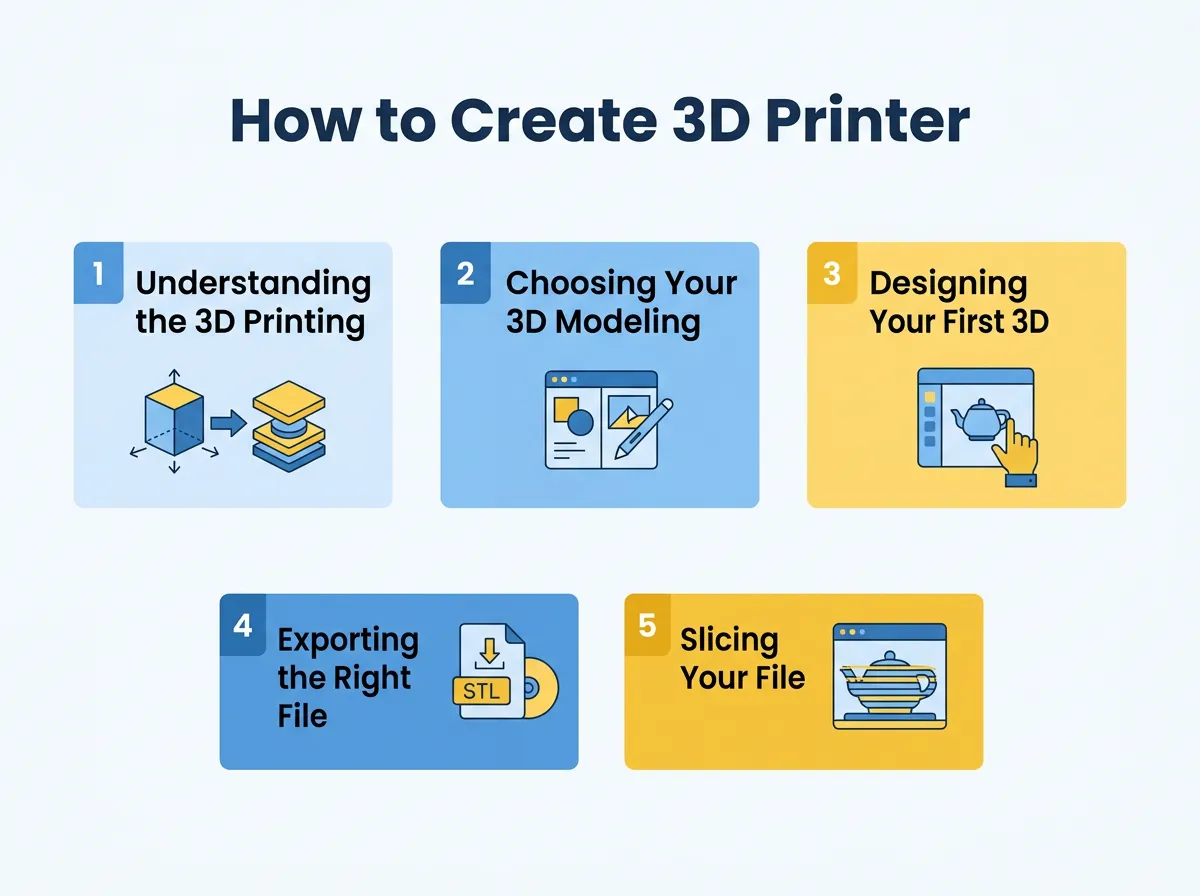
To understand how to create 3D printer files, you first need to understand the journey of a 3D print. A 3D printer cannot read a standard picture or a drawing on a piece of paper. It needs highly specific instructions. This journey has three main steps. Understanding this workflow makes it much easier to learn how to create 3D printer files without getting confused along the way.
First, you create a digital 3D model on your computer. This is a virtual representation of your object. Second, you export this model into a format the computer can share. Third, you feed that file into a program called a “slicer.” The slicer chops the digital model into thousands of flat layers. It then writes a set of instructions called G-code. This G-code tells your printer exactly where to move, how fast to go, and how much plastic to melt.
If you want a step-by-step look at this journey, CNET offers an excellent guide on making your own printables to help you understand the basics of setting up your first project. It is the perfect starting point for absolute beginners.
Choosing Your 3D Modeling Software
You cannot learn how to create 3D printer files without some software. Do not worry; many of the best options are completely free. The tool you choose depends on what you want to make. Let us look at the three main options you have today.
How to Create 3D Printer Files? — key points at a glance
CAD Software for Functional Parts
If you want to make mechanical parts, brackets, or geometric shapes, you want Computer-Aided Design (CAD) software. These tools are based on precise measurements. Fusion 360 is a professional tool that is free for hobbyists. Another great web-based option is Onshape. With CAD, you draw 2D sketches and stretch them into 3D shapes. This is the best route when you want to learn how to create 3D printer files that must fit together perfectly.
Sculpting Software for Artistic Designs
If you want to make miniature figures, organic shapes, or monsters, CAD is not the right choice. Instead, you need digital sculpting software. Blender is the absolute king here. It is open-source, completely free, and incredibly powerful. Sculpting is like working with digital clay. You push, pull, and smooth the surface to make beautiful designs. If artistic expression is your goal, learning how to create 3D printer files using Blender is the way to go.
Beginner-Friendly Tools to Start Today
If all of this sounds scary, start with Tinkercad. Tinkercad is a free, web-based tool made by Autodesk. It uses basic shapes like blocks, cylinders, and spheres. You drag these shapes onto a workplane, resize them, and group them together. It is the perfect place to learn how to create 3D printer files without feeling overwhelmed. You can make your first model in under ten minutes.
Designing Your First 3D Model
Once you choose your software, it is time to design. However, designing for a 3D printer is different than designing for a video game. You must think about gravity, physics, and plastic. Learning how to create 3D printer files means learning to design with the physical limits of your printer in mind.
Key Rules for 3D Print Design
First, consider overhangs. A 3D printer builds from the bottom up. It cannot print plastic in mid-air. If your model has a part that sticks out at a sharp angle, it might need support material. Try to design your parts with 45-degree angles or gradual slopes. This helps the printer build the model without messy droops.
Second, think about orientation. How will the part sit on the printer bed? A flat bottom surface ensures your print sticks well. It also keeps your print from falling over halfway through. If you design with flat bases, you will find that learning how to create 3D printer files becomes much more rewarding.
Keeping Your Model Water-Tight
In the 3D printing world, your model must be “manifold” or water-tight. Imagine filling your digital model with water. Are there any holes? If water can leak out, your slicer software will get confused. Make sure all your vertices and edges connect perfectly. This is a crucial step when learning how to create 3D printer files that actually print successfully. For a deeper look at the modeling process, you can read this helpful Flashforge guide to 3D modeling.
Exporting the Right File Format
Once your masterpiece is finished, you must save it. But you cannot just save it in the program’s default format. You need a format that other tools can read. This is a key step in understanding how to create 3D printer files.
STL vs. OBJ vs. 3MF
The most common file type is STL (Standard Tessellation Language). It is the old standard. It represents the surface of your model using thousands of tiny triangles. Another common format is OBJ, which can save color and texture data.
However, the newer 3MF format is quickly becoming the favorite. It is smaller, holds more data, and rarely suffers from the file errors common to STL files. When people ask how to create 3D printer files, they usually mean creating one of these three file types. To explore more about this transition, check out Sinterit’s deep dive on 3D models for printing.
How to Export from Your Software
In almost every design software, you will find an “Export” or “Save As” menu. Look for STL or 3MF. Set your export tolerance to medium or high. If it is too low, your circles will look like stop signs. If it is too high, your file size will be massive. This makes it slow down your computer when you try to open it later.
Slicing Your File for the Printer
You now have your STL or 3MF file. But you are not ready to print yet. You need to convert this file into G-code. This is where slicing software comes in. Knowing how to use a slicer is just as important as knowing how to create 3D printer files in design software.
What is a Slicer?
A slicer is a program that prepares your 3D file for your specific printer. Popular slicers include Ultimaker Cura, PrusaSlicer, and Bambu Studio. These programs are usually free. You import your digital model, place it on a virtual representation of your print bed, and adjust your settings.
Generating G-code
Within the slicer, you will choose settings like layer height, infill density, and print speed. Layer height determines how detailed your print looks. Infill density determines how solid the inside of your print will be. Once you are happy with your settings, you click “Slice.” The software generates a G-code file. You save this G-code file onto an SD card or send it directly to your printer over Wi-Fi. This final step is the climax of learning how to create 3D printer files.
Tips for Success and Troubleshooting
Learning how to create 3D printer files takes practice. Your first few prints might fail, and that is completely normal! Here are a few golden tips to help you succeed faster:
- Start small: Do not try to design a complex mechanical clock on day one. Start by making a personalized keychain or a simple custom drawer pull.
- Check your dimensions: Keep a digital caliper on your desk. If you are designing a replacement part, measure twice and print once.
- Use the preview mode: After you slice your file, look at the layer-by-layer preview. It will show you exactly how the printer intends to lay down the plastic. If you see paths printing in mid-air, go back and add supports.
- Do not fear failure: Professional designers often print five or six drafts before they get a perfect fit. Treat every failed print as a lesson.
By keeping these simple rules in mind, you will master the art of 3D design in no time. The process becomes easier and more intuitive with every single design you make.
Conclusion
Now you know the secrets behind how to create 3D printer files. The journey from a simple spark of an idea to a tangible, physical object in your hand is incredibly rewarding. It bridges the gap between digital imagination and physical reality. Once you learn how to create 3D printer files, you are no longer limited by what you can buy in a store.
By breaking the process down into modeling, exporting, slicing, and printing, you can conquer any design challenge. Do not let complex software scare you away. Grab a free account on Tinkercad, play around for an hour, and send your first custom design to the printer. Once you experience the thrill of holding something you designed yourself, you will never look back.
Frequently Asked Questions
Can I convert a 2D drawing into a 3D print file?
Yes, you can import a 2D image file like an SVG into CAD software and extrude it into a 3D object. You can also use free online tools to turn flat logos into simple 3D models.
Is Blender good for creating 3D printer files?
Yes, Blender is an amazing, free tool for creating artistic and organic designs like characters or statues. However, it has a steep learning curve and is less suited for exact mechanical parts.
What is the difference between STL and G-code?
An STL file is the 3D model itself, which contains the shape of your object. A G-code file contains the direct instructions, like speed and temperature, for your specific 3D printer.
How do I make sure my 3D file will print successfully?
You must make sure your design is water-tight, meaning there are no gaps or open edges. Also, design with flat bases and keep angles under 45 degrees to avoid needing extra support material.
Can I modify 3D files that I download online?
Yes, you can import existing STL files into tools like Tinkercad or Blender to change them. This is a great way to customize designs without starting from scratch.
How long does it take to learn how to create 3D printer files?
You can learn the basics of simple tools like Tinkercad in just one afternoon. Mastering advanced CAD software or artistic sculpting can take several weeks of regular practice.
