


Designing for 3D printing requires understanding key principles like wall thickness, overhang angles, and clearances. By using the right CAD software and optimizing your model for the physical printing process, you can easily turn your ideas into successful 3D objects. Always plan your design with the specific printer and material limitations in mind.
Have you ever looked at a cool 3D printed item and wondered how it was made? Maybe you have a 3D printer of your own sitting on your desk. You want to make something unique, but you do not know where to start. It feels like there is a huge wall between your imagination and a finished plastic part. You are not alone in this feeling. Many beginners ask themselves how to design 3D prints without any engineering experience.
The good news is that learning how to design 3D prints is much easier than it looks. With a few simple rules, the right tools, and some practice, you can design anything you want. In this guide, we will walk you through the whole process from start to finish. We want to help you turn your creative ideas into real, solid plastic objects that you can hold in your hand.
We will look at the best software to use for your current skill level. We will also cover the basic rules of design that prevent messy print failures. By the end of this post, you will know exactly how to design 3D prints that look great and hold together well. Let us jump right in and explore the wonderful world of 3D design!
Key Takeaways
- Pick the Right Software: Start with simple programs like Tinkercad and move to professional tools as your skills grow.
- Mind the Overhangs: Keep angles under 45 degrees to avoid messy prints and reduce the need for support structures.
- Ensure Correct Wall Thickness: Design walls to be at least double your nozzle diameter to guarantee strong, printable objects.
- Account for Tolerances: Leave a clearance gap of 0.2mm to 0.4mm between moving or interlocking parts.
- Orient for Strength: Place your model on the print bed in a way that minimizes stress on individual layer lines.
Quick Answers to Common Questions
What is the easiest software for designing 3D prints?
Tinkercad is the easiest software for beginners because it uses simple drag-and-drop shapes. It runs in your web browser and requires no prior design experience to learn.
What is the 45-degree rule in 3D printing design?
The 45-degree rule states that any overhang angle steeper than 45 degrees needs extra support structures to print correctly. Designing angles below this threshold prevents droopy lines and saves filament.
How thick should walls be when designing a 3D print?
Your model’s walls should be at least double the size of your printer nozzle, which is usually 0.4 millimeters. For durable and robust prints, design walls that are at least 0.8 to 1.2 millimeters thick.
What file format should I export for 3D printing?
The most common file formats for 3D printing are STL, OBJ, and 3MF. Slicing software easily imports these formats to convert your design into paths the printer can follow.
How do I design moving parts that fit together?
To design parts that fit together, you must leave a clearance gap of 0.2 to 0.4 millimeters between the interlocking surfaces. This tolerance accounts for the slight expansion of the hot plastic during printing.
📑 Table of Contents
Choose the Right 3D Modeling Software
To start your journey, you need a tool to build your ideas. There are many programs out there. You should pick one that fits your current skill level. You do not need to buy expensive software to get started. Some of the very best tools are completely free to use. When you learn how to design 3D prints, your software choice determines your workflow.
Beginner-Friendly Design Tools
If you are completely new to this, start with simple tools. A great web-based option is Tinkercad. This tool lets you combine basic shapes like blocks, spheres, and cones. It is very easy to use. You can learn how to design 3D prints in just a single afternoon using this interface. It is perfect for kids and adults who want to test their first ideas without feeling overwhelmed.
Advanced and Professional Software
When you feel ready for more detail, you can move to parametric modeling tools. Fusion 360 and Onshape are fantastic choices. These programs let you use exact measurements and sketches. If you want to make organic shapes like statues or characters, try Blender. Blender is free and highly powerful. Choosing the right software is the first big step in learning how to design 3D prints.
Understand Key 3D Printing Constraints
Unlike drawing on paper, 3D printing deals with the real world. Gravity and hot plastic change how you must design. If you ignore these rules, your print might turn into a pile of plastic spaghetti. Before you start drawing, knowing how to design 3D prints with physical limits in mind is crucial.
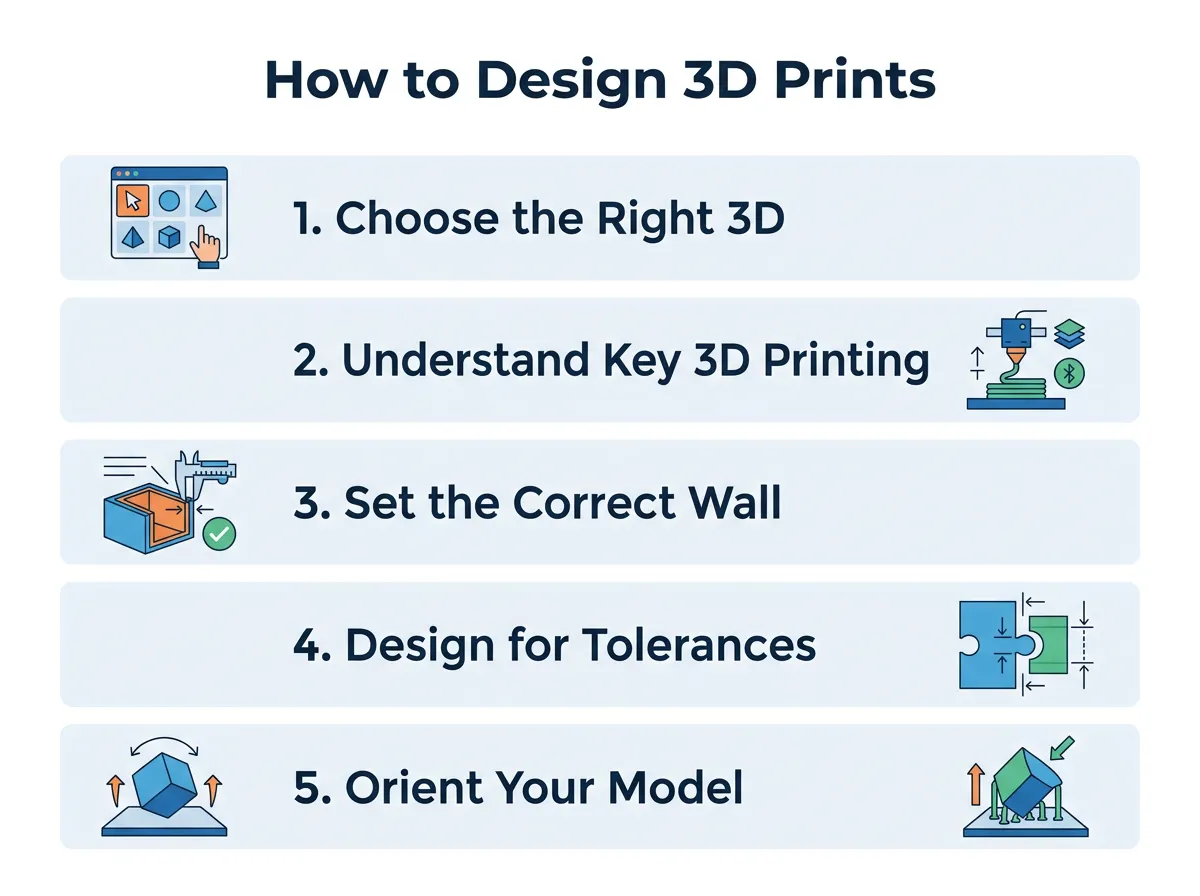
How to Design 3D Prints? — key points at a glance
Overhangs and the 45-Degree Rule
A 3D printer builds things layer by layer, from the bottom up. Each new layer needs something underneath to support it. If your design has parts that stick out sideways, they are called overhangs. As a rule of thumb, keep your overhang angles under 45 degrees. If you go past this, the hot plastic will droop and make a mess. Learning to avoid steep angles is a key trick when studying how to design 3D prints. You can read more about these rules on Creality’s design tips blog.
Bridging and Flat Spans
Bridging happens when the printer links two raised points with a straight line of plastic. Printers are actually very good at this. But if the bridge is too long, the middle will sag down. Try to keep your bridges short. If you must design long bridges, plan to use support material that you can break off later. Minimizing supports makes post-processing much faster and cleaner.
Set the Correct Wall Thickness
One common mistake is making parts too thin. Thin parts will snap easily. They might not even print at all if they are thinner than your printer’s nozzle. You must give your model enough substance to stand on its own.
Minimum Wall Thickness Rules
Most standard 3D printers use a 0.4 millimeter nozzle. This means your walls should be at least two times that size. Aim for a wall thickness of at least 0.8 millimeters to 1.2 millimeters. If the part needs to be very strong, make the walls even thicker. Understanding wall limits is vital when figuring out how to design 3D prints that last through daily use.
Infill and Shells
You do not need to make your models completely solid. Solid models use too much plastic and take a long time to print. Instead, you design the outer shells and let your slicing software fill the inside with a grid pattern. This pattern is called infill. A 15% to 20% infill is usually plenty for most decorative or light-use objects. This saves you filament and reduces print times significantly.
Design for Tolerances and Moving Parts
Do you want to make a box with a lid? Or maybe a toy with gears that turn? If so, you must leave room between the moving parts. This space is called tolerance. Without it, your moving parts will fuse into a single solid block.
The Importance of Clearances
Plastic expands slightly when it is hot. If you design a peg and a hole with the exact same size, they will fuse together. To prevent this, you must leave a small gap. For most home printers, a gap of 0.2 millimeters to 0.4 millimeters works best. If you want a tight fit, go smaller. For loose joints, make the gap larger. Knowing how to design 3D prints for mechanical uses requires a good grasp of these clearances.
Testing Your Fits First
Do not print a massive ten-hour model before testing your gaps. Design a small, quick test piece first. Print a tiny peg and hole to see if they fit well together. This smart step will save you hours of time and lots of wasted plastic. Knowing how to test your ideas is a big part of learning how to design 3D prints successfully. You can find excellent advice on tolerance limits in the BCN3D design guidelines.
Orient Your Model for Maximum Strength
The way you place your model on the print bed matters a lot. 3D prints are weakest along their layer lines. You must think about where the stress will be when someone uses the printed object. Proper orientation can double the strength of your part.
Layer Adhesion and Strength
Imagine a plastic stick printed standing straight up. If you bend it, it will snap easily along one of the horizontal layer lines. If you print the same stick lying flat on the bed, the long plastic strands will run the length of the stick. This makes it much harder to break. Always orient your design so that the forces push against the layers, not along them. Many guides on how to design 3D prints stress the importance of layer lines for structural integrity.
Reducing the Need for Supports
Supports are extra towers of plastic that hold up overhangs. They are helpful, but they leave ugly marks when you pull them off. When you master how to design 3D prints, you will try to build them in a way that minimizes supports. Often, simply rotating your model 90 degrees in your head can remove the need for supports entirely. This leaves you with a much smoother surface finish.
Review and Export Your Final Design
Once your model looks perfect on your screen, it is time to get it ready for the physical world. This is the final step in the design phase. You want to make sure the file is clean and readable by your printer.
Checking for Solid Geometry
Your model must be watertight. This means there should be no holes or gaps in the outer shell of your design. The software needs to know exactly what is inside and what is outside. Most modern design programs have built-in checkers to ensure your file is solid and ready to print. If you have holes, your slicing software might get confused and skip layers. Understanding this step completes the loop of how to design 3D prints.
Choosing the Right File Format
Export your design as an STL, OBJ, or 3MF file. These are the standard formats that slicing software can read. Once exported, load the file into your favorite slicer program, set your print settings, and send it to your printer. Now you know the core steps of how to design 3D prints from scratch!
Conclusion
Designing your own 3D prints is incredibly rewarding. There is nothing quite like holding a real, physical object that started as a simple thought in your mind. While the rules of 3D design might seem strict at first, they quickly become second nature to you.
Start with basic shapes and simple tools like Tinkercad. As you get more comfortable, push your boundaries with advanced programs. Always keep wall thickness, overhangs, and tolerances in mind. With every print, you will learn what works and what does not. So, fire up your computer, open a design program, and start making your own custom models today!
Frequently Asked Questions
Can I design 3D prints on my phone or tablet?
Yes, you can design 3D models on mobile devices using applications like Shapr3D or Tinkercad’s iPad app. These tools offer touch-screen optimization for drawing and editing shapes. However, for complex designs, a computer is still highly recommended.
Do I need to be good at math to design 3D prints?
You do not need advanced math skills to create excellent 3D prints. Most modern software handles the complex geometry and calculations for you behind the scenes. Basic knowledge of measurements and scaling is more than enough to get started.
What is the difference between solid and hollow 3D print designs?
Solid designs are filled completely with material, making them heavy, expensive, and slow to print. Hollow designs feature outer shells with empty space or lightweight grid patterns inside called infill. Most functional designs use infill patterns to save material while keeping high structural strength.
Why did my 3D design warp or peel off the print bed?
Warping usually happens when the plastic cools too quickly and shrinks, pulling the edges upward. To prevent this in your design, avoid sharp, square corners on the base of your model. Rounded corners distribute cooling stress much better and stick to the print bed more easily.
Is Blender good for designing functional 3D prints?
Blender is excellent for artistic, organic, and highly detailed models like miniatures or sculptures. However, it can be difficult to use for precise functional parts with exact measurements. For mechanical designs, parametric software like Fusion 360 is generally a better choice.
How do I make my 3D printed threads and screws fit?
Designing working threads requires matching the pitch and leaving a clearance gap of about 0.15 to 0.3 millimeters between the male and female threads. It is also helpful to use a chamfer on the entry points of the threads. This helps the screws align and bite together smoothly when you assemble them.
