


Designing your own 3D prints is the ultimate way to transition from a passive consumer to a creator, allowing you to bring custom, functional concepts to life. By choosing the right CAD software for your skill level—such as Tinkercad for beginners or Fusion 360 for professionals—you can easily sculpt and refine your ideas. Mastering crucial design constraints like wall thickness and print orientation ensures your digital models translate flawlessly into successful physical objects.
How to Design Your Own 3d Prints?
Have you ever searched online for a specific 3D model, but found nothing? You want to make a small plastic hook for your wall. Or maybe you need a custom cover for your TV remote. But the files you find online are either too big, too small, or just not right. It is a common problem for many people who buy a new printer.
You buy a nice machine, but you only print other people’s designs. It feels like you own a fast sports car, but you only drive it in your driveway. You want to make your own things. You want to bring your own ideas into the real world. The good news is that you can do this. You do not need to be a tech genius or an artist.
In this guide, we will show you how to design your own 3D prints. We will cover the best software tools for beginners and advanced makers. You will also learn the core rules of 3D design and how to avoid mistakes. By the end, you will have a clear roadmap to create your own custom objects.
Key Takeaways
- Choose the right software: Select parametric CAD for functional parts or sculpting software for artistic designs.
- Measure twice, print once: Use digital calipers to ensure highly precise dimensions for functional fits.
- Design without supports: Minimize overhangs by keeping angles under 45 degrees to save time and material.
- Optimize wall thickness: Ensure walls are multiples of your printer’s nozzle diameter for stronger prints.
- Account for tolerances: Leave a 0.2mm to 0.4mm gap between interlocking or moving parts.
- Print small test models: Verify fits and tolerances with quick, low-resolution test prints first.
Quick Answers to Common Questions
What is the best free software for beginners to design 3D prints?
Tinkercad is the ultimate web-based starting point for beginners because it uses simple shape-building blocks. Once you are ready for more advanced projects, Fusion 360 offers a free personal-use license with powerful parametric design tools.
Do I need to be good at drawing to design my own 3D models?
Not at all! 3D modeling relies on manipulating geometric shapes and inputting precise dimensions rather than freehand sketching, making it accessible to anyone.
What is the most important design rule to prevent 3D print failures?
Always design with the “45-degree rule” in mind to minimize steep overhangs that would require messy support material. Additionally, make sure your model’s walls are at least 1.2 to 2 millimeters thick so they do not break during or after printing.
How do I prepare my finished design so the 3D printer can read it?
Export your completed design from your CAD software as an STL or 3MF file. Then, open that file in a “slicer” program like Cura or PrusaSlicer to translate the 3D shape into G-code layers your printer understands.
How do I design parts that successfully fit or snap together?
The secret is adding “tolerances” to your measurements to account for plastic expansion during printing. Leaving a small gap of about 0.2mm to 0.4mm between interlocking parts will ensure a perfect, snug fit.
📑 Table of Contents
Why You Should Learn How to Design Your Own 3D Prints
It feels great to hold an object that was just a thought in your head an hour ago. When you learn how to design your own 3D prints, you gain a unique skill. You do not have to wait for someone else to upload a file. If a plastic clip breaks in your kitchen, you can measure it and print a new one. This saves you both time and money.
Designing your own parts also lets you fix unique problems. Most homes have odd spaces or custom needs. Maybe you need a bracket to hold a shelf at a strange angle. When you know how to design your own 3D prints, you can make the perfect tool for the job. It turns your printer from a toy into a real tool.
Sharing your work with the community is also very fun. The 3D printing world is big and helpful. People love to see new, creative fixes to old problems. You can read this great guide on how to create custom 3D prints to see how other people get started with their projects. Once you start, you will look at every broken item in your house as a fun challenge.
Find the Best Software for Your Skill Level
To start, you need software to draw your model. This is called CAD software. Do not let the name scare you. There are many easy programs available today. You do not need to pay a lot of money, and you do not need to be a tech wizard to master how to design your own 3D prints.
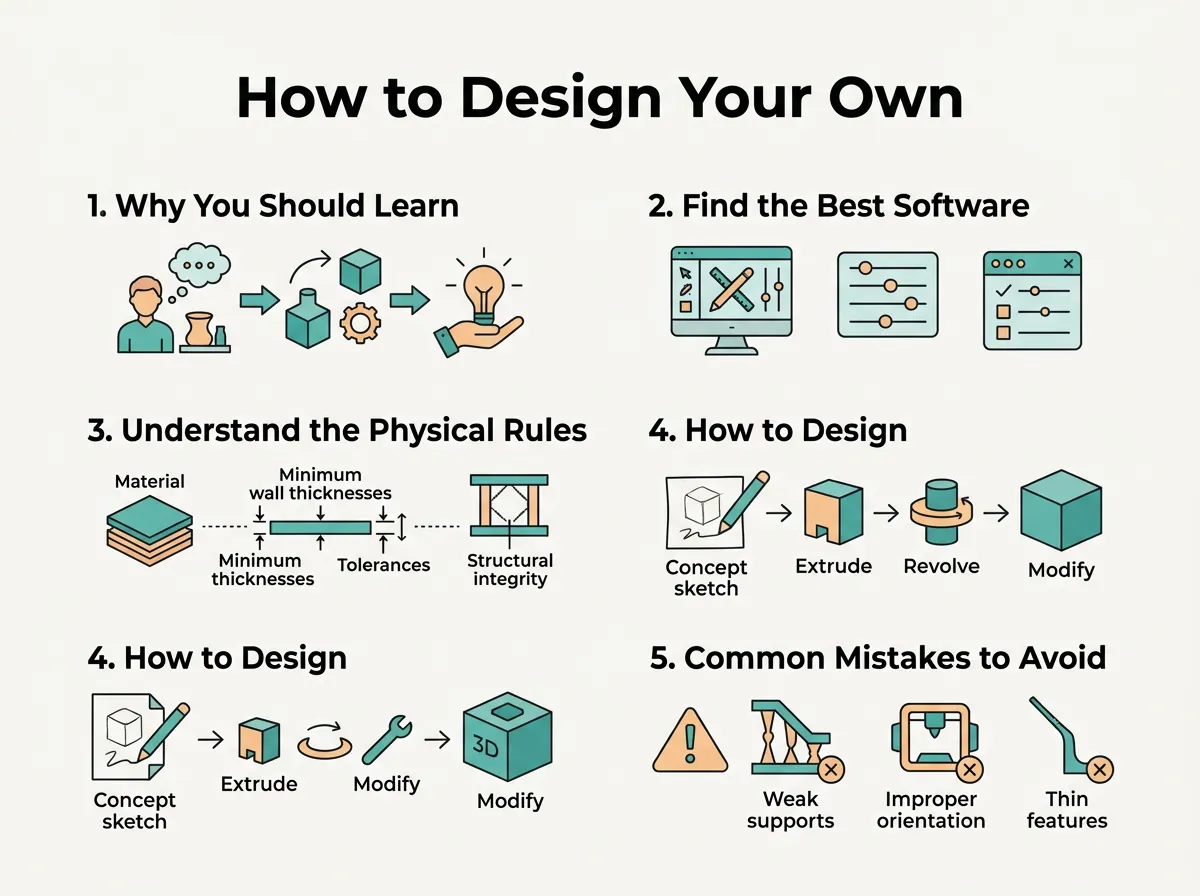
How to Design Your Own 3D Prints? — key points at a glance
Easy Tools for Beginners
If you are new, start with simple shapes. You can stack blocks, cones, and balls to make cool things. A great tool for this is Tinkercad. It is free and runs right in your web browser. You can use Tinkercad’s free 3D design tool to learn how shapes blend. It is like playing with digital building blocks. It is perfect for kids and adults who want a quick start.
Advanced Tools for Exact Designs
As you get better, you will want more control. You might need to make parts that fit together perfectly. For this, you can use programs like Fusion 360 or Onshape. These programs let you type in exact measurements. If you want to sculpt organic shapes, like a toy dragon or a face, you should try Blender. Blender is free and very powerful, but it takes some time to learn.
This table helps you pick the best tool as you learn how to design your own 3D prints:
| Software Name | Skill Level | Best For | Price |
|---|---|---|---|
| Tinkercad | Beginner | Simple shapes, toys, fast drafts | Free |
| Fusion 360 | Intermediate | Mechanical parts, exact fits | Free for personal use |
| Onshape | Intermediate | Browser-based design, math-based parts | Free for personal use |
| Blender | Advanced | Sculpting, art, complex figures | Free |
Understand the Physical Rules of 3D Design
A 3D printer builds things in a unique way. It melts plastic and lays it down layer by layer. This means you must follow physical rules when you design. If you ignore these rules, your prints will warp, sag, or fail completely. Once you grasp how to design your own 3D prints, you must learn these physical limits.
The Rule of Overhangs and Supports
Think about building a bridge with wet clay. You cannot lay clay down over thin air. The same goes for hot plastic. If your design has a part that sticks out like a roof, it needs help. We call this an overhang. Try to keep angles under 45 degrees. If you must have a flat overhang, your printer will have to build temporary supports. This wastes plastic and takes time to clean up.
Wall Thickness and Part Strength
Your parts need to be strong enough to hold together. If your walls are too thin, they will tear like paper. A good rule of thumb is to make your walls at least two times as thick as your printer’s nozzle. Most nozzles are 0.4 mm wide. This means your walls should be at least 0.8 mm thick. You can check out these useful tips on how to create 3D models for printing to learn more about wall strength and fill patterns.
How to Design Your Own 3D Prints Step-by-Step
Let us walk through how to design your own 3D prints from scratch. We will design a simple pen cup for your desk. It is a great first project, and you can use it right away.
Step 1: Sketch and Measure
Do not start on the computer. Grab a pen and paper. Draw a rough sketch of your cup. Next, grab a ruler or calipers. Measure the pens you want to hold. Write these numbers down in millimeters. Most design software works best with millimeters. Let us say we want our cup to be 60 mm wide and 100 mm tall.
Step 2: Create the Base Shape
Open your design software. Draw a simple cylinder on the screen. Set the width to 60 mm and the height to 100 mm. This is the solid body of your cup. It looks like a soda can right now, but we need to make it hollow.
Step 3: Hollow It Out
To make it hold pens, we must hollow out the top. In your software, create a second cylinder. Make this one slightly smaller. Let us make it 54 mm wide and 95 mm tall. Place this smaller cylinder inside the big one. Push it down so it does not go through the bottom. Now, use the cut tool to subtract the small cylinder from the big one. You now have a hollow cup with strong, 3 mm thick walls.
Common Mistakes to Avoid When You Design
When you start to learn how to design your own 3D prints, you will make mistakes. That is part of the fun. I made many bad prints when I started out. Here are a few common traps you can avoid easily.
Forgetting About Tolerances
If you want two parts to slide together, you cannot make them the exact same size. Plastic expands slightly when it gets hot. If you design a peg that is 10 mm and a hole that is 10 mm, they will not fit. You need to leave a small gap. This gap is called tolerance. A good starting gap is 0.2 mm. This gives the parts enough room to slide together without being too loose.
Using Bad Bed Adhesion Shapes
Your print must stay glued to the printer bed while it prints. If the bottom of your model is tiny or round, it will tip over. Always try to give your models a flat bottom. If your model has a strange shape, design a flat base for it. You can cut the base off later, or make it a feature of your design.
Start Small and Keep Learning How to Design Your Own 3D Prints
Learning how to design your own 3D prints is a rewarding journey. Do not feel bad if your first few designs do not look perfect. Start with small, quick projects. Make a simple keychain with your name on it. Make a basic box to hold paperclips. With each small win, you will build your confidence.
Over time, you will look at everyday items and think about how you can improve them. You will see a broken hook and know exactly how to draw a better one. This skill turns your 3D printer into a powerful home workshop. So, open up a design tool today, draw a basic shape, and start making your ideas real!
Frequently Asked Questions
What is the easiest software to use when learning how to design your own 3D prints?
Tinkercad is widely considered the best starting point for beginners because of its intuitive, block-building interface. For more advanced or mechanical shapes, Fusion 360 is an excellent free-for-hobbyists option, while Blender is perfect for organic, artistic sculpting. Starting with user-friendly software allows you to understand the basics of 3D space without getting overwhelmed by complex tools.
Do I need to know how to draw to design 3D models?
No, you do not need any traditional drawing or artistic skills to design your own 3D models. Most design programs utilize geometric primitives like cubes and cylinders, or allow you to input precise measurements to build functional parts. With a little practice, anyone can learn to manipulate digital shapes to create highly detailed objects.
What are the most important rules to follow when you design your own 3D prints?
When designing, you must always design with printability in mind, which means minimizing steep overhangs and bridging distances. It is also crucial to ensure your model has a flat base for bed adhesion and that your walls are thick enough to withstand the printing process. Keeping these physical limitations in mind during the design phase will save you time and prevent failed prints.
What is the difference between CAD and mesh modeling for 3D printing?
CAD software, like Fusion 360, uses precise mathematical measurements to create functional, mechanical parts with exact dimensions. Mesh modeling software, like Blender, manipulates a network of vertices and polygons, making it ideal for organic shapes, characters, and artistic designs. Choosing the right method depends entirely on whether your project requires mechanical precision or artistic freedom.
Can I design 3D prints on a mobile phone or tablet?
Yes, you can absolutely design 3D prints on mobile devices using modern, powerful apps like Shapr3D or Nomad Sculpt. Many of these apps are optimized for stylus use, making the design process highly intuitive and portable. Once finished, you can easily export your creations to a cloud service to prepare them for printing on your computer.
How do I prepare my files after I design my own 3D prints?
Once your design is finished, you must export it as an STL, OBJ, or 3MF file from your modeling software. Next, you import this file into a “slicer” program like Cura or PrusaSlicer, which translates your 3D object into G-code layers that your printer can read. After adjusting your slicer settings like infill and layer height, you are ready to send the file to your 3D printer.
