


Creating your own 3D prints starts with a great digital design. You can design custom objects by choosing the right CAD software, applying key design rules like wall thickness, and exporting your file as an STL. With a few simple steps, you can turn any creative idea into a physical, real-world object.
Imagine holding a unique plastic bracket in your hand. You designed it. You printed it. It fits perfectly into your broken window blind. This is the amazing magic of desktop fabrication. But how do you start? It all begins on your computer screen. Learning how to make a 3D model for 3D printing? is the key to unlocking this creative world.
Do not worry if you do not have an engineering degree. You do not need to be a math genius. Designing for 3D printers is now easier than ever. It is very much like playing with digital clay or building blocks. Today, we will guide you through the whole process. We will look at software choices, basic rules, and step-by-step design steps. Let us dive in!
Key Takeaways
- Pick the Right Software: Start with easy browser tools like Tinkercad before moving to advanced programs.
- Keep Walls Strong: Design your model with a wall thickness of at least 1.5 to 2 millimeters to prevent breaking.
- Avoid Steep Overhangs: Keep angles under 45 degrees to minimize the need for messy support structures.
- Leave Room for Tolerances: Add a gap of 0.2 millimeters between moving parts so they do not fuse together.
- Export Correctly: Save your completed designs as STL or 3MF files for smooth slicing.
Quick Answers to Common Questions
What is the easiest free software for beginners?
The easiest software for beginners is Tinkercad, which is free, runs in your web browser, and uses simple shapes to build models.
Which file format is best for 3D printing?
The STL format is the most common and widely supported, but the newer 3MF format is excellent because it stores more data in smaller file sizes.
Why do 3D prints need support structures?
Supports are needed because printers cannot print in thin air, so temporary plastic columns hold up angles steeper than 45 degrees.
How thick should 3D printed walls be?
For most general prints, you should make your design walls at least 1.5 to 2 millimeters thick to prevent breaking.
What is a slicing program?
A slicer is software that cuts your 3D digital model into flat, horizontal layers and generates G-code instructions for your printer.
📑 Table of Contents
Understanding the Basics of 3D Models
To make a physical object, your printer needs a digital map. This digital map is your 3D model. The printer reads this map and lays down plastic layer by layer. This is called additive manufacturing. It is different from carving wood, where you cut material away.
What is a Watertight Model?
Before you print, your model must be watertight. In the digital world, this is also called “manifold.” Imagine filling your 3D model with virtual water. Does it leak? If there are any holes or open edges in your design, the printer will get confused. It will not know which part is solid and which part is empty space. Good software helps you check for these tiny holes before you export.
Solid vs. Mesh Modeling
There are two primary ways to create 3D files. First, we have solid modeling. This uses exact math and measurements. You use shapes like cubes, cylinders, and spheres. This method is perfect for functional parts. If you need to fix a tool or build a bracket, use solid modeling.
Second, we have mesh modeling. This is like sculpting digital clay. You can pull, push, and stretch a surface to make organic shapes. This is the best method for making toys, action figures, or art pieces. Knowing how to make a 3d model for 3d printing depends on which style you choose.
Choosing the Right Design Software
You do not need to spend money to start designing. There are many fantastic free tools online. Let us look at the best options for your current skill level.
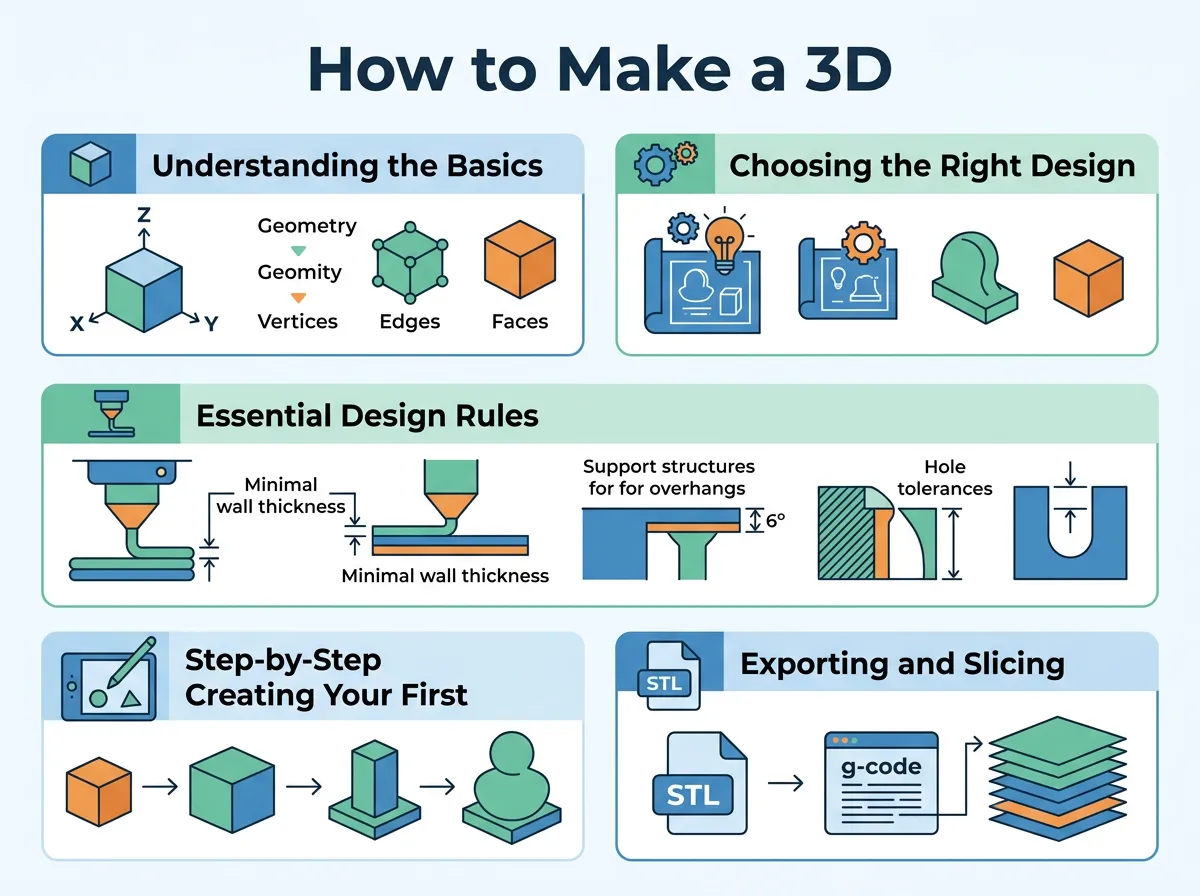
How to Make a 3D Model for 3D Printing? — key points at a glance
Best Tools for Beginners
If you are new, start with the Tinkercad 3D design platform. It is a free tool that runs inside your web browser. You do not need to install anything. Tinkercad uses basic shapes. You can drag a block onto the screen, resize it, and combine it with a cylinder. You can also use “hole” shapes to cut pieces out. It is as simple as building with plastic bricks.
Intermediate and Advanced Tools
Once you feel comfortable, you can move to more advanced software. For precise engineering models, try Fusion 360 or Onshape. These programs let you change your design history. If you make a mistake, you can go back and edit a past step easily.
For artistic designs, Blender is the king of free software. It has a steep learning curve but offers endless options. You can find many guides to help you transition to these tools. For example, this Instructables 3D modeling guide offers step-by-step paths for moving from simple to complex tools.
Essential Design Rules for 3D Printing
Designing for a screen is different than designing for the real world. On the computer, everything is weightless. In the real world, we have gravity, heat, and plastic limits. Keep these rules in mind.
Wall Thickness and Infill
Your model cannot have walls that are infinitely thin. If a wall is too thin, the printer cannot print it, or it will snap easily. Always keep your wall thickness above 1.5 millimeters. Inside the model, you do not need solid plastic. Slicing software will fill the inside with a hollow mesh called infill. This saves plastic and time while keeping the part strong.
The 45-Degree Rule for Overhangs
A 3D printer builds from the bottom up. Each layer must rest on the layer below it. If you design a shape that sticks out too far, it will drop to the ground. This is called an overhang. As a general rule, angles up to 45 degrees print fine without support. Anything steeper than 45 degrees will sag. You can add temporary plastic supports to hold these parts up. However, removing supports can leave rough marks. Try to design your shapes to avoid them!
Tolerance and Clearances
Do you want to make a box with a lid? Do you want two gears to turn together? You must leave a small gap between moving parts. If you make them the exact same size, they will fuse together during printing. Leave a gap of at least 0.2 millimeters between parts that need to move.
Step-by-Step: Creating Your First Model
Let us make a simple, custom keychain with your name on it. This is a perfect starting project.
Step 1: Design the Base Plate
Open your design software. Draw a flat rectangle on the screen. Let us make it 50 millimeters long, 20 millimeters wide, and 3 millimeters thick. This is the flat base of your keychain.
Step 2: Add a Hole for Your Keys
Next, we need a place to put the metal ring. Place a small cylinder near one end of your rectangle. Make it 5 millimeters wide. Instead of making it solid, set it as a “hole” or “subtraction.” This cuts a clean circle right through your base plate.
Step 3: Add Your Text
Now, use the text tool to type your name. Place the text on top of the base plate. Make the letters stick up by 2 millimeters. Group all these parts together so they become one solid object. You just learned the basics of how to create 3D models for printing!
Exporting and Slicing Your Design
Once your design is complete, you are ready to prepare it for printing. This involves two final steps.
Export to STL or 3MF
Export your design from your 3D software. The standard file type is STL. It turns your smooth model into a mesh of triangles. Another great choice is 3MF. It is a newer format that holds more data, like color and materials, in a smaller file size.
Slice the Model
Now, open your file in a slicing program. A slicer takes your 3D model and cuts it into hundreds of flat, horizontal layers. It turns your design into G-code. G-code is the language that tells your printer where to move, how fast to go, and how hot to get. You can adjust your print speed and layer height here. A smaller layer height means a smoother print but a longer print time.
Conclusion
Learning how to make a 3D model for 3D printing? is an exciting journey of trial and error. Do not feel bad if your first few prints do not come out perfectly. Every designer makes mistakes. The secret is to start with simple shapes and slowly build your skills. Soon, you will look at everyday problems and say, “I can design a fix for that!” Grab your laptop, open a free software program, and start modeling today!
Frequently Asked Questions
Can I 3D print a model without slicing it first?
No, you cannot print a model without slicing it. Slicing converts your 3D model into layer-by-layer G-code, which is the only language a 3D printer can read.
What is the difference between CAD and 3D modeling?
CAD, or Computer-Aided Design, focuses on precise engineering and mechanical parts. General 3D modeling includes organic sculpting for art, figures, and video games.
How do I make sure my 3D model is watertight?
You can use repair tools in slicing software or dedicated programs like Meshmixer to close open edges. A watertight model has no gaps or holes in its outer shell.
Is Blender good for designing functional parts?
Blender can make functional parts, but it is not the best tool for the job. It is better for artistic and organic shapes, while CAD tools like Fusion 360 are better for exact measurements.
Can I turn a 2D picture into a 3D model?
Yes, you can convert a 2D image into a 3D model. You can use vector files like SVGs to extrude flat images, or use AI tools to generate 3D meshes from photos.
What is infill density in 3D printing?
Infill density is the percentage of plastic that fills the inside of your model. A standard 15% infill creates a strong internal grid pattern without wasting material.
